Showing posts with label Dollar Store Hacks. Show all posts

Tuesday, June 24, 2014

Jurassic Park Birthday Party on a budget


Today I wanted to share with you a birthday party for my son that was a total hit, but didn't break the bank. Let me introduce you to my son. This is Noah, he loves dinosaurs and has an incredible imagination. For his fifth birthday, I wanted to do something special for him. I had great plans to take him to a dinosaur museum, but after months of searching for an exhibit near us, I came up empty-handed. Noah's favorite movie right now is Jurassic Park. He just loves the idea of dinosaurs, so I thought it would be a great way to throw a birthday party.

     A feast for Carnivores and Herbivores alike
Little disclaimer: If you are searching for a beautiful tablescape to present gourmet food, you have to come to wrong place. I believe that Pinterest somewhat clouds our perception of what a "great party" should look like. You see, while pretty tables are nice, a five-year-old boy could really care less about that. With that being said, I'll go straight to what a five-year-old boy cares all about: the food.


We went simple with food, and tried serving kid basics. Chicken nuggets, pretzels, chocolates, bugles. Just mainly munchies. The key was to create fun "dino" language for them. They were a real hit with the kids and the adults got a kick out of the names.

The real crowd pleaser, however were the dino bones. These I made out of pretzels, marshmallows and hardened chocolate. While Pinterest made it look "easy" I had to figure out a method to it before it looked good. At first, they just looked like dumbells because the marshmallows were too big. I cut them into 4's and they seemed to be big enough to resemble the ends of bones. Also, don't let the chocolate harden too much, keep it hot, or else it will be a hot mess.
 Here is the end result. Noah was super excited to eat these dinosaur bones!
 

 Below are the signs I used, along with a blank one for you to write what you will. Feel free to use them.


                      Adults Can Have Fun Too!


Because our family likes to do birthday parties right, they all agreed to dress as characters from the movies. Noah had such fun guessing which character we were. We also had fun creating movie memes that we put throughout the house. It's a fun way to incorporate the movie and entertaining kids and adults. Because let's face it, being an adult at a kid birthday party isn't always fun, making memes and dressing up allowed for adults to participate too. 
                      Here are some of my favorite memes:


  One thing I love to do is incorporate kids in getting ready for the party. They're so excited, but it can take hours before it's time to celebrate, so what can they do? I sent the kids out with sidewalk chalk to make dinosaur footprints to further decorate for the party. It was entertaining AND helpful. Also, some of the dino drawings they came up with were hilarious!


 Let The Games Begin!


For boys, it's all about the games. You've got to have good ones to keep the party hopping. So the first game we played was a small remake of the original game we played for Elijah's Star Wars Party called "Don't fall into the tarpits!" The children had to hop, skip and jump onto the rocks (created with sidewalk chalk) and make sure not to fall in the tarpits, or they would become extinct! Kids of all ages love this game and it's one we like to come back to.

                                             I Really DIG this party!

The main dino-event at our party was the dino-dig. I've seen many variations of this, but it was important to find realistic dinosaur bones for our very enthusiastic little boy. We got two giant packing containers (from the garage) and bought sand from the local hardware store. We decided to seperate the diggers into two teams: Carnivores and Herbivores, so that they wouldn't be chucking dirt in each other's faces and so as to not create giant arguments. We settled on a model we found on Amazon that had several different pieces to find and buried them in various depths in the sand. Then we had the teams use little paint brushes, just like regular paleontologists, so as to not hurt the bones.
 
This took up a large portion of the time and it was fun to see their excited giggles as they found a new bone each time. It really tapped into their imagination.


 Once they had found all of the bones, they had to put it together. This was a little more challenging than we anticipated, but even with the dads helping out it was still fun to see their dinosaurs come to life.


As you can see, the finished product put a smile on his face, and I could see that this was exactly the kind of "dinosaur birthday" he had been dreaming about.


                                           Let Them Eat Cake!
Of course, I could have gone all out on the fancy cakes that I saw all over google. In the end, our Noah was so specific about what kind of dinosaurs he wanted on the cake that we ended up just making one and letting him choose out of his personal collection what kinds got to go on his cake. It may not be pinterest pretty, but he loved it. He also loved being able to be a part of the process. After all, it is HIS birthday, why not let him choose what was on the cake?


And no party would be complete without a T-Rex pinata. The kids had a grand old time whacking that T-Rex. 


  And there you have it: our Jurassic Park Party on a budget. Full of imagination and fun!

post signature

Thursday, April 24, 2014

How to add embellishments on regular picture frames


 I am the girl who keeps several picture frames in her garage at a time, just waiting for the next project. Whenever I go bargain hunting, I'm always looking for the most ornate, embellished picture frames I can. But those can be costly and often difficult to find. So I came up with a solution of  how to add embellishments on regular picture frames. And I'd like to share it with you today as a part of the Dollar Store Hacks series.

                   
                              These are the tools you will need to complete this project:


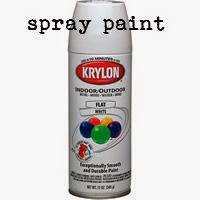
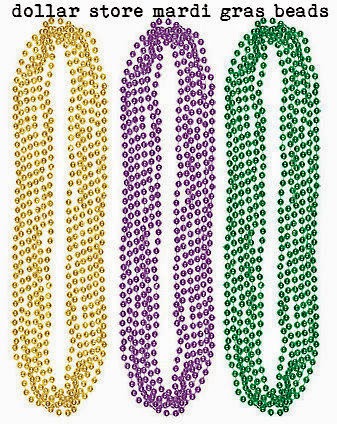
 Step One: spray paint the frame the color you want. Make sure to use several coats until it's completely covered. I chose white to create a more shabby look for my frame. Step Two: lay the beads on a flat surface and cover them with the same colored spray paint. You may need 2 cans to fully coat both the frame and the beads. It also may take several coats to cover the metallic colors of the beads.

Step Three: This comes the tricky part. Once both your frame and your beads are completely painted and fully dried, it's time to combine them. Cut the necklaces one time so that it's just a straight line of beads. Match the beads to the side of the very edge of the frame. Place a line of Gorilla Glue along the edge of the frame.  

CAUTION: Working with Gorilla glue can be tricky. Make sure not to get any on your fingers. It dries quickly and it expands when dry so make sure it's placed where it needs to be quickly and that the beads are straight.

Hold firmly for a few minutes. If there are extra beads, you can put them around the corner or cut them off and join them with another strand of beads. Do this until all the corners are covered.


Step Four: By now your beads will completely cover the frame. Any excess glue that is showing you can peel off. I chose the white color because the Gorilla Glue I used dried white and it was easier to hide. If you chose a different color, I would suggest covering the frame in a third coat of spray paint to hide any extra glue.


And there you have it, a much more embellished frame. For more dollar store hacks check out my dollar store hacks label.

Or you can click and save this for later on pinterest.
Follow my blog with Bloglovin
post signature

Wednesday, August 21, 2013

A STAR WARS party on a DOLLAR STORE budget


This weekend we just finished one of the most elaborate birthday parties I have ever thrown. For Elijah Cole. So.. how did I do it you ask? Well, Pinterest helped absolutely. A lot of my ideas aren't that original really. But I feel like I get a lot of moms saying "I just don't have the money to do something big like that."

Let me just tell you.... I am FAR FROM daddy warbucks. But I love to throw a good party for my kids. So I decided to challenge myself with this birthday party and only use items from the dollar store or that cost a dollar.


Food made cheap and easy: The first thing you should know about me is that I am NOT a cook. When parties come my way I break out into cold sweats just thinking about the food part of things. But this party made me get creative about the food (especially with the dollar store budget). Everyone of the food items I purchased at Walmart or the dollar store for, you guessed it, a dollar.


Yoda soda was Walmart punch mixed with Walmart brand sprite. Cheap and everyone loved it. I made the invitations and food tags myself on pixlr.com. But if you're interested in using the ones I made, I'm happy to share:


Instead of a cake, I opted to make cupcakes. I chose chocolate and vanilla as representatives of the darkside and the lightside and had each Padawan choose which side they would be on. I then headed on over to Meckmom who had some delightful free cupcake topper printables that helped make the cupcakes more festive. In the end, I made 36 cupcakes for $6 and the kids loved them (also the adults).


A Bit About Costumes: I'm not a sewer at all. But I wanted to make sure our family had costumes to help create the look and feel of the party. My Princess Leia hair was all sock buns. If you haven't tried them, you're missing out. Tim and I just used what was in our closets for clothes. As did Ms. Liv. But the boys needed a bigger element in order to help get them into the spirit of things. Both of my boys wanted to be Luke Skywalker. So what is a mom to do? I decided to make one a fighter pilot Luke, and the other a Jedi. For Elijah's costume I borrowed from a very talented friend of a friend. She made a fabulous Luke Skywalker costume, and if you are a sewer, she has a great step by step of it HERE.


For Noah's costume, I used an orange t-shirt (because it's super hot out) and boots we had to help make the fighter pilot attire. Any good fighter pilot knows, it's the helmet that makes the outfit. I found an amazing tutorial here  and ended up spending about $2 on it.

While a lot of moms spend a great deal of time on decore and food at parties, I prefer to have a good program. I mean, what good is a beautiful setting with tasty food if you didn't have any fun? Program is key in my book, and it's what I spent the most time on. I decided to do a theme of Padawan Training. I love to use my little guy's imagination and really get into things. So the first thing I wanted to create to kind of introduce the idea to everyone is by using an opening training video. I noticed there weren't really any videos like that on youtube, so I had to make one myself. It's not specific to Elijah, so if you want to use it, you are welcome to it:


After the video, we went outside to the official "Training Academy". The first thing we did was take the Padawan oath. To serve and protect the galaxy and to not let the darkside of the force cloud our judgement.

At this time, I started playing a series of star wars themes to help create an atmosphere of imagination. It really made each obstacle much more real and alive.

Next was the lazer beam obstacle course. We took the dog run on the side of our house and transformed it with $1 yarn from Walmart, duct tape and tacks. The kids loved it and kept going through with more and more special "tricks". It became a contest of who could do it with the most style. And they loved at the end of the party attacking it with their lightsabers.


Next was the lava pit. Simple dollar store sidewalk chalk guided our younglings on a course through hot lava. They loved seeing how fast they could get through the pits without getting burned.


After the obstacles were thoroughly played through, I then chose to break out the lightsabers.        

Note: the key strategy is to wait on the lightsabers as late as possible in the training, so there are less blows to the head while waiting their turn in line.

I made the lightsabers, like many other pinterest moms out there, by using dollar store pool noodles cut in half. Other tools of the trade were duct tape and electrical tape to make the buttons and knobs and to make each lightsaber unique to the kids. I made 12 lightsabers that cost me $8 total.


"Lightsabers UP!" I began going through a series of excercises with them, carefully making sure they were standing in a line so as to avoid bops to the opponent's head. When that was finished, I unleashed the storm trooper balloons I made. 


The balloons were a fun idea, but a great example of how even the best laid plans don't always work out. Because it was outside, the balloons quickly popped and a game that was designed to be 8 minutes long, lasted about a minute and a half and ended up with some of the children in tears who were so upset their balloons popped.

I had to do something, and I had to do it fast. So I had them assemble back on the line and went through another "training excercise" where Tim and I fought each child and had them use their newfound skills.

This turned out to be a huge success, and prepared them for THE BIG SURPRISE.

Note: when throwing a budget birthday party it is important to use what is available to you. Borrowing and asking for help are key to making a budget birthday a success.

Which brings me to the major reason why I chose the Padawan training. I had a wonderful friend who happened to be related to some pretty spectacular men who owned storm trooper costumes and a Darth Maul full costume. They kindly agreed to visit the children and be the big finale to the training. Naturally, this could also be accomplished by buying a mask and having a family member come out in a black cape (or a dollar store table cover). But we enjoyed the authenticity and theatrical surprise these delightful characters brought to the birthday.

When I had finished battling the younglings, I had them line up and told them that I felt they were ready for their last test of the darkside. I asked them if they felt ready, and waited until they all excitedly screamed.  


The Darth Maul theme played, and out from the side of our house came Darth Maul and two storm troopers.


 It's important to note that some of the younger children got pretty frightened. But I felt that this was a 6-year-old's birthday party and what better way to make it real than to have a duel with the actual characters? As you can see, the kids got really into it. And Darth Maul and the Storm Troopers were so very kind to have taken so many vigorous hits by pool noodles.


In the end, the Padawans successfully defeated the darkside and raised their lightsabers in celebration. They recieved Training Academy certificates and were brought back into the house to cool off. and to have the opportunity to take some pictures with the darkside.


I mean really? What kid wouldn't love this photo op? They posed so well and allowed each kid to come and take a photo with them.  It was something even the parents excitedly got into. (Oh Uncle Jason).


The backdrop for the pictures was made from 2 dollar store black table cloths, some tacks, dollar store star stickers and Cardstock board from, you guessed it, the dollar store.

Of course, these kind hearted characters didn't just stop at posing for pictures, they even delivered presents for the birthday boy.


They showed him kindness and love and I absolutely broke down crying when I saw this scene. They really ARE nice guys :)

Ofcouse the party wouldn't be complete without one of Uncle Jason's now world famous pinatas. This one was a death star and a very special lightsaber (wooden dowel rod, carefully painted) to hit it with. It was just big enough for Elijah to hold and it was so much fun to Destroy the Deathstar!


And there you have it. It wasn't anything fancy, but it was definitely memorable and fun, and in the end, isn't that what every kid wants for their birthday? I hope it encourages you that you really can throw an incredibly fun birthday party on a dollar store budget!